This step by step diy woodworking project is about 12×16 barn shed plans. The project features instructions for building a large shed with a gambrel roof, that has a significant storage space. If you want to build a basic storage barn with loft, take a look over these plans. Check out PART 2 of the article to see how to frame the roof of the shed. See the rest of plans for more outdoor projects. Premium Plans for this project available in the Shop.
When buying the lumber, you should select the planks with great care, making sure they are straight and without any visible flaws (cracks, knots, twists, decay). Investing in cedar or other weather resistant lumber is a good idea, as it will pay off on the long run. Read the local building codes before starting the project, as you might need a building permit. In addition, level the area and remove the vegetation layer. See all my Premium Plans HERE.

Hammer, Tape measure, Framing square, Level
Miter saw, Drill machinery, Screwdriver, Sander
Safety Gloves, Safety Glasses

One day
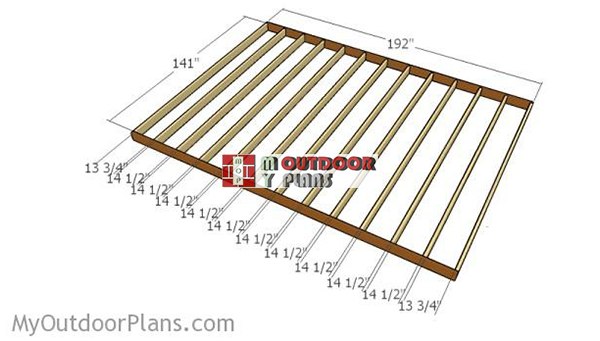
The first step of the project is to build the floor frame of the shed. Cut the components from 2×6 lumber and drill pilot holes through the rim joists. Align the edges with attention and check if the corners are square before inserting the 3″ screws.
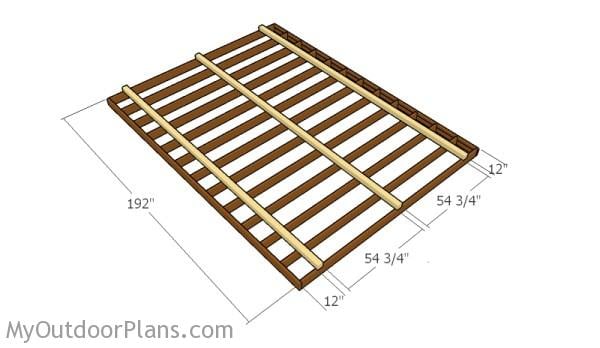
Attaching the skids
Attach 4×4 skids under the floor frame to protect it from moisture.

Attaching the plywood floor
Attach the 3/4″ plywood sheets to the floor frame. Align the edges with attention and leave no gaps between the components. Use 1 5/8″ screws to lock the plywood sheets to the joists, every 8″.

Build the side walls from 2×4 lumber. Cut the components from 2×4 lumber, after taking accurate measurements. Drill pilot holes through the plates and insert 2 1/2″ screws into the studs. Place the studs every 24″ on center and make sure the corners are square.
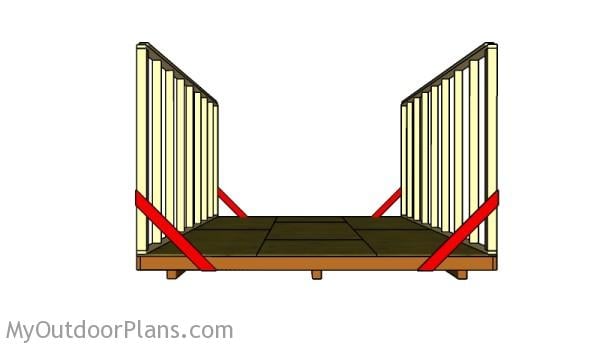
Attaching the side walls
Fit the side walls to the floor of the shed. Use a spirit level to plumb the walls and lock them into place with 2×4 braces. Drill pilot holes through the bottom plates and insert 3″ screws into the rim joists.
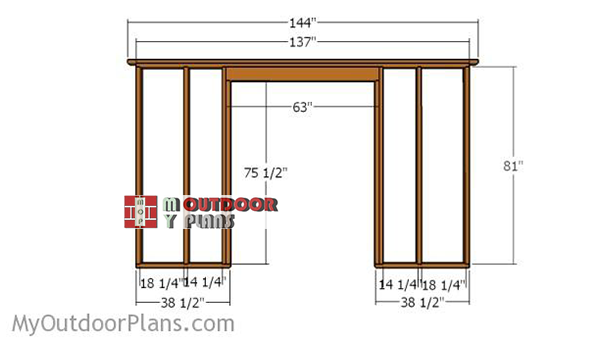
Build the front wall for the barn shed using the instructions described in the diagram. Cut the components from 2×4 lumber. Drill pilot holes through the plates and insert 2 1/2″ screws into the studs. Make sure the corners are square and align the edges. In addition, you can adjust the width of the door to suit your needs.
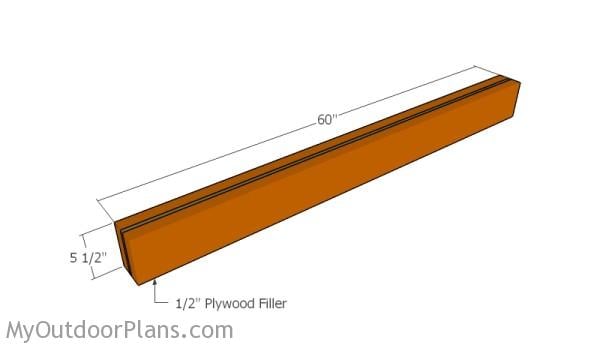
Build the header from 2×6 beams and 1/2″ plywood. Cut the beams at 63″ (ignore the 60″ in the diagram, which is wrong). Fit the plywood between the beams. Drill pilot holes through the beams and insert 2 1/2″ screws, on both sides of the header.
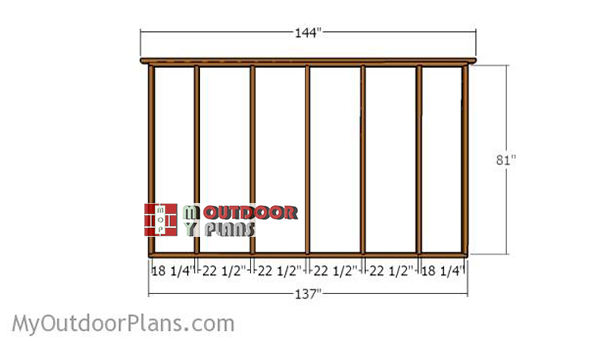
Build the back wall from 2×4 lumber, using the information from the plans and following the techniques described above.
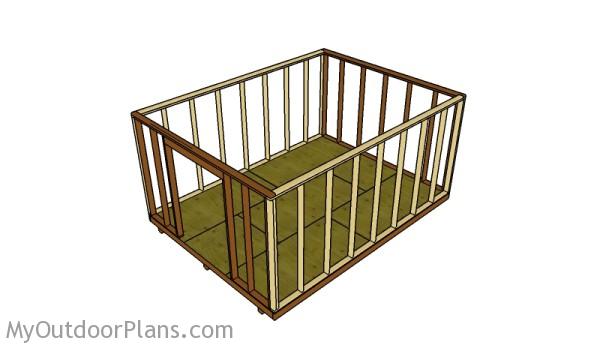
Assembling the frame of the 12×16 shed
Fit the front and the back walls to the floor of the barn shed. Align the edges with attention and make sure the corners are square. Drill pilot holes and lock the adjacent walls together with 2 1/2″ screws. In addition, connect the double plates together with 2 1/2″ screws.
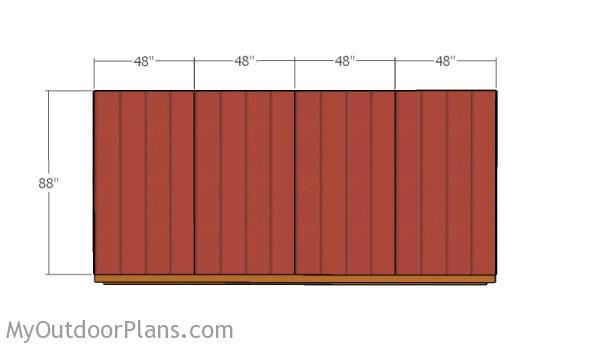
Fitting the side siding
Attach T1-11 siding to the sides wall, as shown in the diagram. Align the top of the sheets and lock them into place with 1 5/8″ nails, every 8″ along the studs. Leave no gaps between the sheets for a professional result.
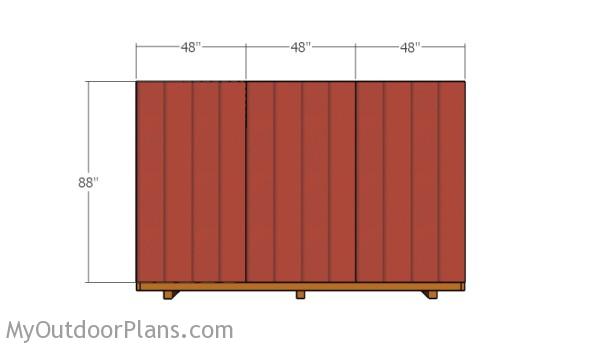
Fitting the back wall siding
Attach siding sheets to the back of the shed, as well.
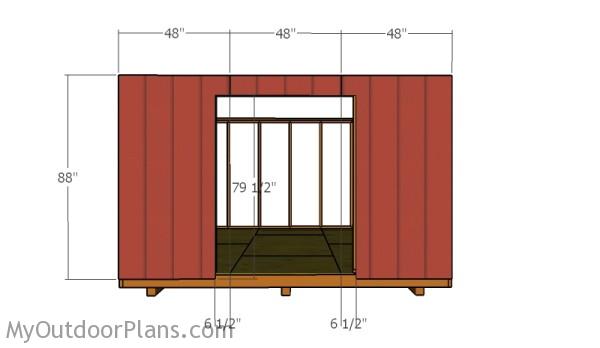
Make a few cuts to the sheets, so that they can fit around the door opening.
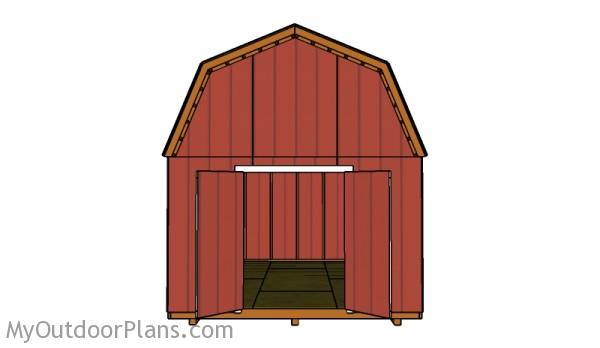
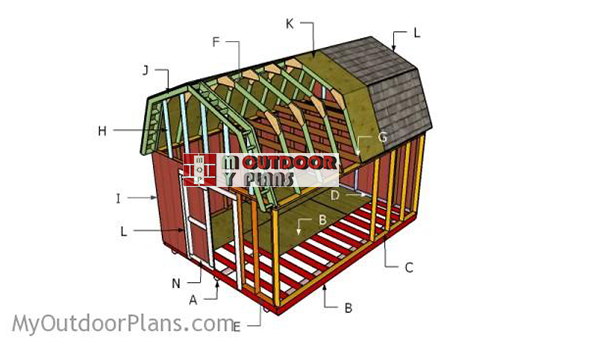
Building a large barn shed
Make sure you check PART 2 of the project to lean how to frame the roof for the gambrel shed.
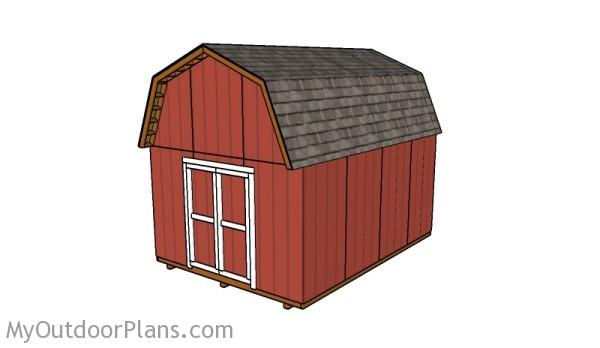
12×16 Barn Shed Plans
Fill the holes with wood putty and let them dry out for a few hours. Smooth the surface with 100-200 grit sandpaper and remove the residues with a damp cloth. Premium Plans for this project available in the Shop.
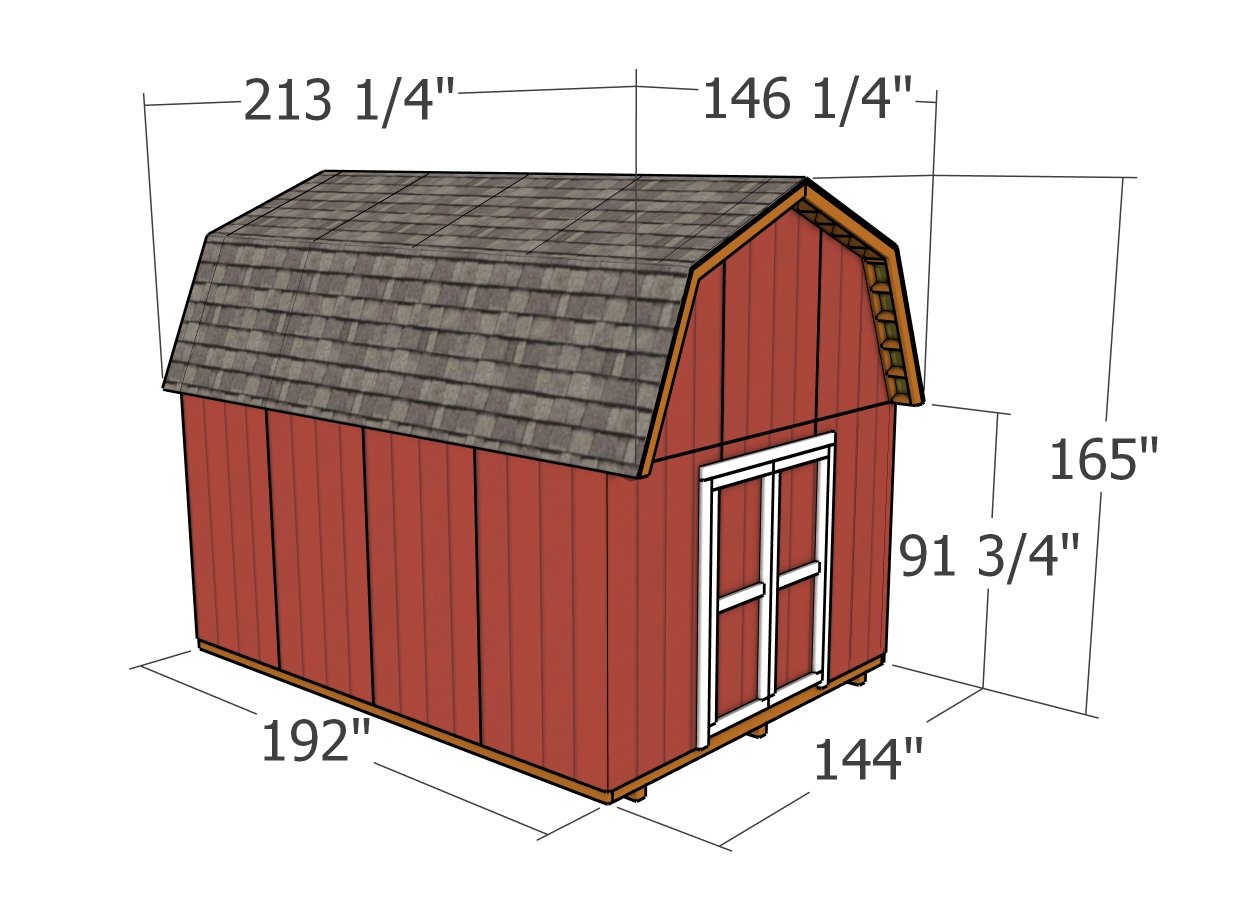
12×16 Barn Shed Plans – dimensions
Building a 12×16 barn shed with double front doors will likely cost you between $2,000 and $4,000, depending on the materials and finishes you select. The barn-style design, with its classic roofline and spacious interior, adds some extra character and functionality, making it well worth the investment. This shed not only offers ample storage but also enhances the overall look of your property with its timeless, rustic appeal.
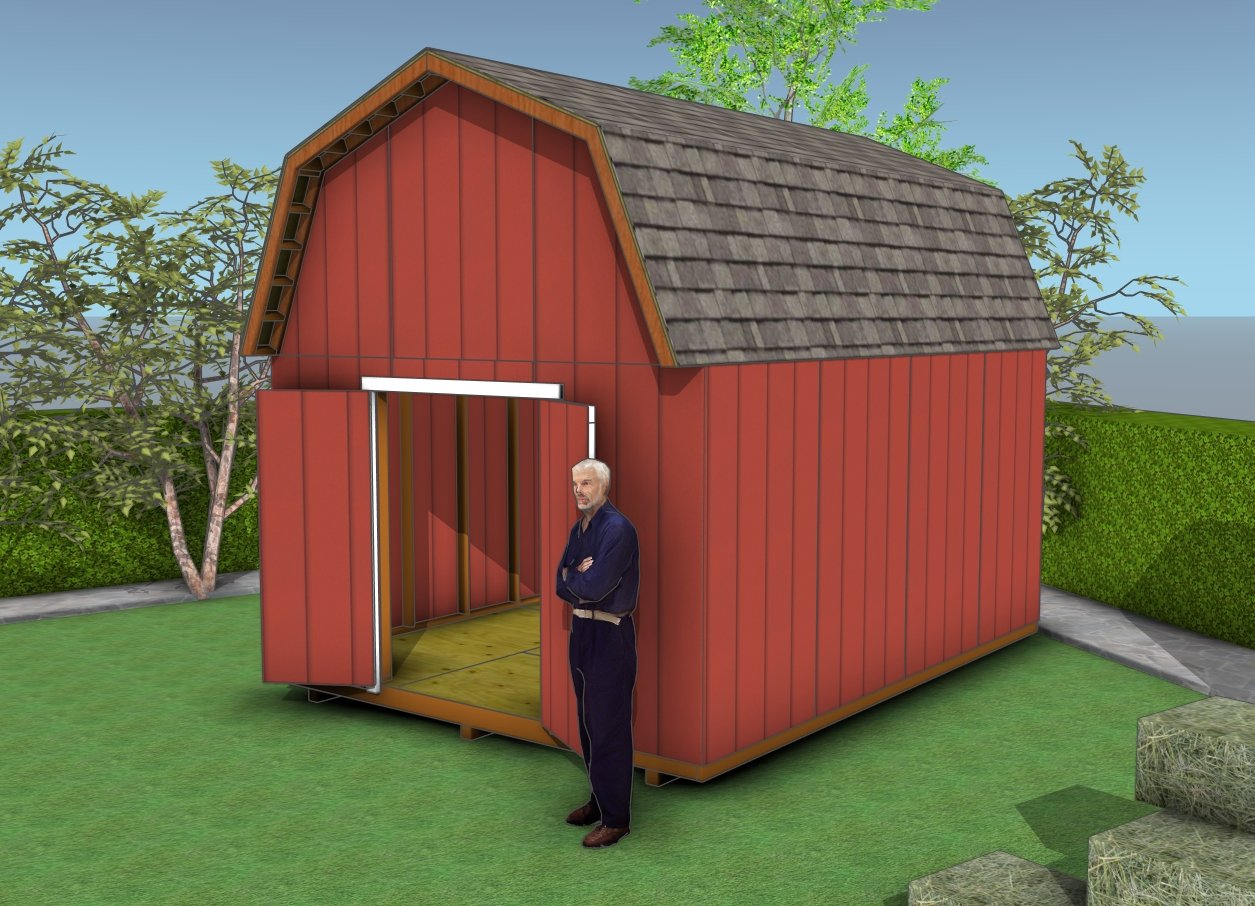
12×16 barn shed – free plans
You can expect to spend about 4 to 6 weekends constructing your 12×16 barn shed with double front doors. The barn design requires careful framing and attention to detail, especially with the roof and doors, but the process is straightforward if tackled step by step. By the end of it, you’ll have a solid, spacious shed that’s both functional and visually appealing.
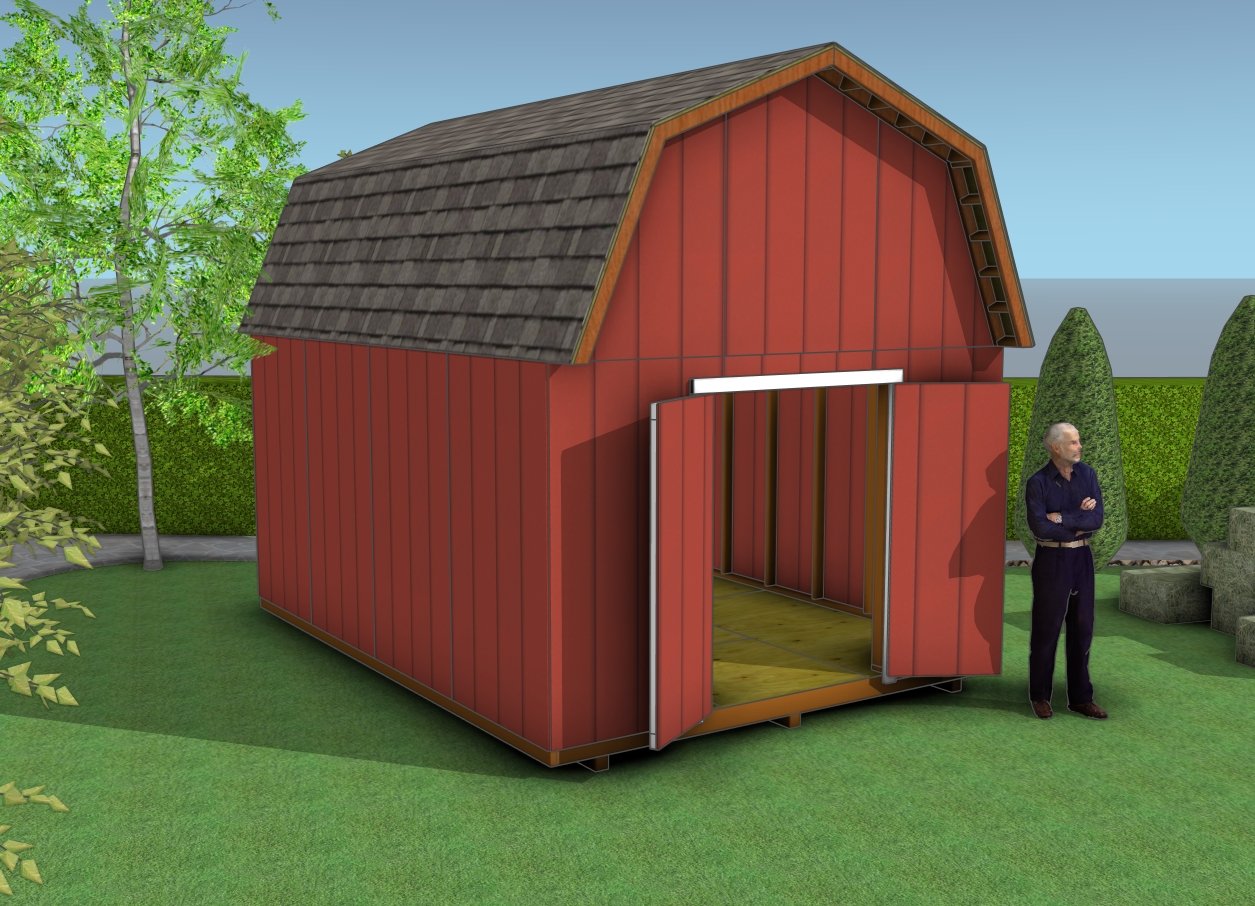
How to build a 12×16 barn shed
As you finish your 12×16 barn shed with double front doors, take a moment to appreciate the blend of form and function you’ve created. This isn’t just a storage space—it’s a barn-style shed that brings both utility and charm to your backyard. The double doors provide easy access, making it perfect for storing large items, while the classic barn design adds a touch of rustic elegance that will stand the test of time.
Top Tip: Check out the rest of the project, to learn how to build the roof for the shed, as well as the double doors.
If you want to get PREMIUM PLANS for this project (different design with re-engineered structure), in a PDF format, please press GET PDF PLANS button bellow. Thank you for the support.

This woodworking project was about 12×16 gambrel shed plans. If you want to see more outdoor plans, check out the rest of our step by step projects and follow the instructions to obtain a professional result.